Having Fun Yet?
Tuesday October 1st, 2019 5:00am
So when I started this blog I promised I would bring you all the ups…… and downs to what we are doing. Well, I am hopeful, and pretty sure, that we will look back at this time and find it well worth the struggle, but that’s what I am doing right now, struggling a bit. And last night topped it off.
To best describe the stresses incurred recently, I had better start from when we took delivery of our new Grand Design Solitude 3740BH. After months of research, some intense negations and shuffling of kids in order to think clearly to do this well, Leah and I were picking up the biggest piece of the puzzle to make our dream a reality!


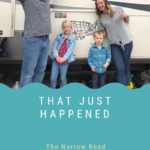
Those are some crazy kids!! What a cool feeling to see it coming together!
Only days before, I had also taken delivery of a new Reese Goosebox. My research had led me to this device as an answer of how I was going to most comfortably and efficiently tow a condo across the country. This thing is great and deserves its own blog entry of its own – for anyone who has questions regarding this, please reach out. However, I had to talk the dealer into installing it at the time of picking up the Solitude or else I wouldn’t be able to tow her off the lot. Oh yeah, and right about the time I took the freight delivery for the goosebox, Brutus (our truck) got a flat of the inside rear tire on the passenger side! Thank goodness for insurance as I did not yet have a jack big enough or the knowledge yet to change a tire on a dually.
Goodness, Ok, so now I am supposed to pull a 40 foot 5th wheel through Indianapolis on a “repaired” tire, with a relatively new towing system I made the call on without any experience, and the largest thing I had ever towed any distance was my raft trailer! After a quality walk through and explanation of the ins and outs of the rigs, we made our way north through Indianapolis (as much of 465 was shut down). That was tough and included going under a 13’7” bridge finding out later the exact height of the Solitude is 13’5”, but backing it up to into the tight long drive of Leahs’s aunts’ house I was unable to do unscathed. Nothing bad, but I did brush against some tree branches, knocking the awning motor cover off at the very top of the rig. That hurt as It was brand new, but was only a cheep part and a few scratches to be buffed out.
Two weeks later we were able to make our first trip of greater than 100 miles up to Auburn to park it at my brother and sister in-law’s to allow us to make some modifications. With the help of Leah’s family we were able to take out the sleeper sofa in the loft and modify one of the bunk platforms into a shelf by cutting it in half and remounting. In order to open the space a bit we also removed all the window blind valences and decided to paint all the walls a slight shade of white. This requires a coat of primer and two coats of white paint. Imagine the most difficult room you have ever painted and multiply that by about 75. The amount of cramped, close areas to trim and cut in was incredible! Well, we got it done after a few long days and are glad we did.


So worth it to make the space feel more open – but the trim work and cutting in – barf.
It was driving home from this Auburn trip that I began to get a “trailer Disconnected Warning” shouting at me from the truck dash. Oh that’s not good. I finished the trip back to park it at Leah’s aunt’s house again, but had 4 days to try and problem solve while homeschooling the kids at my parents’ house where we were living, 30 minutes away from the RV! I was able to get a mobile RV tech to meet me out there, and after tracing the electrical signal, we located a grounded trailer safety breakaway switch. Great! Let’s fix that – problem solved! Now we can take off towards Crown Point to stay in our RV for the first time, and on our 10th wedding anniversary!!
We were making this trip in an effort to see my grandparents and aunt/uncle in Chicago area. Well about 1/2 way up, the signal began again! Intermittently I would loose the electric trailer breaks. Not good, and this continued on our way home as well. I was able to figure out a way to pull the trailer from the north to the south side of Indianapolis to get it to the dealer. Yet again, Mom came through to help watch the kids for the morning. This time the service reps were great in locating the issue as a ground wire in the break hub, fixing the issue and getting the RV back to us the next day.
Awesome! This fix was tested one week later with a trip back up to Auburn to move things in as well as install quite a few things. This trip was warning signal free! Thank goodness, but did not spare me from many more trials. I mounted and hooked up a WiFi hub to the RV, assembled and installed a cool IKEA fold away desk for the kids room, and installed a separate washer and dryer into our closet!


These photos don’t really go well together, but oh well. On left is the wiring solution to tie in the WiFi hub mounted on the roof. On the right is Faith showing off her new classroom – both of which are working out very well for us!
Let’s start with the dryer. First of all, the space to work with was cramped to say the least. The manufacture puts a little sticker to locate a safe spot to install a drier vent and save yourself from hitting the vertical aluminum beams and horizontal wood studs. Well that is nice, but doesn’t line up with the dryer vent, and given the space available, there is no way to have a vent tube turned to get there without kinking. So we lined it up by using some white paint on the vent outlet on the appliance, then pushed it against the wall. That is where I was to drill a 4” hole through my brand new RV!!! After testing for studs, away I went! The hole was made and a few other twists and turns were made to instal the dryer. It was in!


A four inch hole all the way through our brand new rig! Cringe!
Now let’s turn to the washer….. A smart suggestion we followed was to install a drip pan below the unit should there be a leak in the unit. Great idea, but should there be a leak, that water needs to go somewhere. Another hole in the rig? Well ok, here we go. After figuring out what to use as the actual drain (a series of pvc and fittings), I lined up the pan to where it would exit the side of the RV. Uh, yeah that’s definitely a stud. So I filled the pan’s hole, made a new one, and this looked appropriate so I drilled a pilot hole and didn’t hit anything. I used a one foot long, one inch diameter spoon bit. As I was going through the wall, I caught the top of one of those unpredictable horizontal studs that threw the bit up at and angle and out the side of the RV! Now the exit point for the drain would not allow the pan to sit on the floor. I had to mount the pan to 2×4’s on their side to elevate things, leaving only a paper thin margin for the top of the unit to fit in. I also had to move the electrical outlet for everything to fit. But it did! And I am happy to say I have done several loads successfully, and saved around $1500 over the initial quote ordering and installing it ourselves!


Ugh, just looking at that drip pan again makes me throw up a little in my mouth.


The before and after shots.
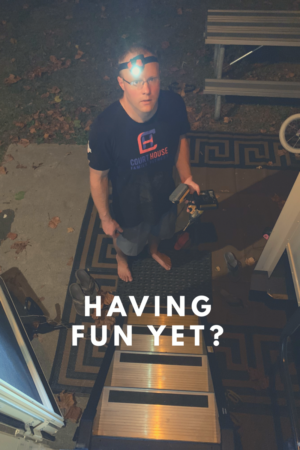
This brings me to last night. We had always had issues with the black tank empty valve being “tighter” than it should have been, and recently had begun having some difficulty emptying the black tank. I figured the valve was not shutting all the way and was partially blocked by something. I decided to steel myself, locate the valve, disassemble and fix it. I knew it wouldn’t be pleasant, so I did my best to rinse and rinse the black tank all day, but still some water would continue to reside and stink in there. So I dropped the floor, or underbelly of the front compartment of the RV. Well, that’s weird. Why is the insulation so wet with water dripping off the floor? I have no experience with this stuff, yet can tell when something is leaking that shouldn’t be. I found what looked like a crack in the bottom bolt of the valve assembly where water was leaking from. As quick as I could, I sprayed flex steel and tapped up the valve as best I could. All this while working in 16 inch clearance with poopy smelling water dripping all over me. So lovely. I figured I had this sealed well enough for now, replaced the insulation – enough to get by until the dealer could get us in.

Poop – that is poop water on me.
I woke up again this morning way to early with much on my mind, so I figured I’d get these updates down. I don’t have much going on the rest of the week, only watching the kids in a nice campground with 90 degree humid heat and no vehicle (Leah’s got it at work), and preparing to take a jurisprudence exam at a testing center on Friday after moving the rig to somewhere… not sure exactly where yet. ARE WE HAVING FUN YET?
Monday October 7th 2019 2:00pm
Update: the Wednesday after the above occurred, my brother and sister in law were so nice in offering their time so I could reattach the front 10’x8’ underbelly (which involved much strain under the rig with drilling, pulling and twisting for around three hours that evening). However, my suspicion of “something else” going on under there led me elsewhere.
I noticed the possibility of too much sag coming from the rear underbelly, an immense piece of material around 10’x32’. I began poking around and nudged a few of the randomly places center bolts, and received a squishing liquid response. Oh no. I removed these bolts and was rewarded with a stream of yet more poopy water! Are you kidding me????? Having had enough, I slashed the underbelly with a utility knife by the bolt to see what I would find. Uh, dude…. they had drilled right into the black (AKA poop) tank on two of the bolts instead of the steel crossbeam!!! So these were slowly leaking as well!


A message to the kids out there: Don’t fasten things with screws into sewage tanks. Oh, and don’t do drugs either.
Thank goodness for gorilla products. Their sealing water proof tape and gorilla tape have sealed that for now, making things usable and livable for now…. Ugh. I have a claim started, waiting for warranty and parts from the dealer to get this fixed as soon as possible. But this is our house. We will have to arrange for living quarters while the rv is getting fixed. Luckily, both the manufacturer and service department have been understanding and have promised to take care of things as quickly as possible with full reimbursement.
Oh, and I took the Arizona jurisprudence test and was greeted with an electronic closing statement that results will take several weeks! Ok, I guess we will just have to push back my job interviews and expected departure date by a few weeks. Goes to show you, ones best efforts at planning mean nothing to God’s intensions.
We planned on having this time close to family and the dealer to deal with things like this, but did not anticipate all of this. Also, we had “planned” on leaving within a few weeks for the southwest, but if the corrective work takes longer, Leah still has work and I cannot accept a job without a license. So we know God’s plan is happening for us, I’m just ready to have some fun doing it!!!!


Oh boy!!!! Sounds like some curveballs, but you wouldn’t enjoy the good days without a few tougher ones! Way to be resilient brother!
Thanks Mike! We expected the steep learning curve, but the bumps still sting! We’re in good hands, though 😉
Wow!!! What an experience. You’re doing great Matt!
Thanks, Zach!
By the time you hit the road you’ll know all the ins and outs of your condo on wheels! I guess you could say part of the plan was for you to be “home schooled”. Your passing w flying colors!!
You’re right, Kim, this is certainly an education for me!
Love reading your stories! Good, bad, and ugly it’s all glorifying the Lord! Way to go!
Also, weird fact about me – I really enjoy cutting in and trim work.. Like, I would choose that over using a paint roller any day! So, if you ever decide to repaint you know who to call! 🙃
Safe travels!
You’re hired, Amanda!
So, the life lesson for this part of your journey is S… Happens? Seriously that’s why following your dreams takes such courage. Thanks for sharing the hard parts; makes it real.
In Forest Gump’s words, “it” happens…. “sometimes”.
We are heading to Portland and I just read this post to Cody while he is driving. To be honest, we had a good laugh but also a lot of “oh craps”. We miss you guys. Thanks for keeping us in the loop!
Hahaha yes it’s a lot of ups and downs for us too. I look forward to looking back and laughing about it all. We miss you too!!
Matt,
Loving your posts! We just renovated a travel trailer for my father-in-law. Working on a trailer was much different than working on the house. Hope you got everything fixed.
Hey, if you have a chance could you email me. I could use some professional advice.
Hey,